Building a Timber Barn, continued The notches help ensure that the green posts won’t twist excessively as they dry, and they give the framing more of a “crafted” look. Butt joints in the lintel always break on post centers. We nail through the lintel into the posts with 10- and 12-inch-long galvanized spikes, predrilling every hole. The lintel gets mitered at corners. A 12-inch spike, driven in from the gable end, pins the joint tight.
It usually takes about two days to erect a typical basic barn frame to the level of the second-floor lintel. That includes all the posts, ledgers, wall purlins, diagonal braces, and second-floor planking. At this point, we’ll also have all the rafters cut and ready to raise. But before we raise the roof, we vertically plank the walls. The planking helps to brace the structure, which otherwise has a small but noticeable amount of sway to it. Planking goes quickly; window openings are cut later.
Rafters. The main roof is either a 10- or 12-pitch. We use full 2½ rafters, spaced without regard to the post or floor joist centers. The hefty 6×6 lintel allows us to spread the rafter centers out to 3 feet, more or less. At skylight openings, we double the rafters on either side and may shift adjacent rafter spacing for a balanced appearance. A big part of the appeal of these buildings is just this casual, nonaligned approach to framing. We’re careful with plumb, level, and square but take full advantage of the method’s flexibility.
The ridge board is nonstructural, usually a 2×12. Alan stands the ridge first, then sets the end rafter pairs and another pair near the middle, using a temporary prop to prevent sagging. Then he spaces the remaining rafters, nailing them all first at the ridge only. That makes it easier to sight down the ridge board and straighten it as needed, by moving the rafter tails in or out on the lintel before nailing them. We secure the rafters with metal ties on the outer face of the lintel, where they barely show.
Sheathing As Siding
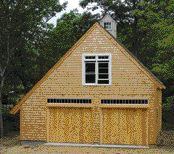
The entire frame is enclosed with air-dried 1×10 pine, smooth on one side. Pine is all you see in the interior of the finished building. Barns vary in size and complexity, but the median price runs about $35,000. If I’m working with a client to cut costs, exterior siding is first up on the chopping block. In the most basic and economical form, the walls of my barns are finished simultaneously, inside and out, with the application of the vertical shiplap planking that encloses the frame, rough side out. Window and door trim is urethane-caulked along the back edge prior to installation over the siding. The head casings are capped with a pitched board in traditional style. I also try to make the roof overhangs as deep as possible to provide some shelter for the windows. Leaks and water stains can occur around the openings, but with a wide-open interior, things don’t stay wet for long. The method is slightly crude but fairly effective.
At the next level of quality, we apply exterior siding, typically eastern white cedar shingles or western red cedar clapboard. Shiplap sheathing becomes redundant, so I use air-dried, square-edge 1×10 instead. Green lumber is less expensive, but not without its perils. Drying shrinkage came back to bite me once or twice early on, with gaps between boards becoming unacceptably wide. Now I’m careful to buy lumber with a stated moisture content of around 15% to 20%, and I’ve had no complaints about joint movement. Some of those seams will open seasonally when humidity drops, so I’m a stickler for using #15 asphalt felt paper on the walls to keep the joints nice and black. Housewrap doesn’t look good showing through the gaps.
The roof is planked with 1×10 shiplap pine, laid perpendicular to the rafters. There’s little, if any, difference in the time it takes to sheath a roof with solid lumber versus plywood, and single roofing boards are safer and easier to handle and place in a breeze than full sheets of plywood. The shiplap pine is milled smooth on one face and is 13/16 inch thick, so it’s important to use only 1-inch roofing nails to make sure no penetrations mar the interior ceiling.
Insulation
A barn is only as warm as the weather outside, but life goes on year-round. When my New England clients plan to use their barn on a regular basis, as a home office or for a business, a heating system and insulation become important.
Since there are no enclosed framing cavities, I usually let the homeowners deal directly with their own contractor and heating system of choice. The same goes for wiring and plumbing. The only subcontractors I work with are in excavation, foundations, siding, and roofing. But because the insulation installs over the outside of the sheathing, we always handle that aspect of the job ourselves. We use rigid polyisocyanurate foam board on the walls and the roof. The basic board has a black glass-fiber-reinforced, asphalt-impregnated facing and is typically used under membrane roofing. The thickness varies, depending on the level of insulation we’re trying to achieve, between 1 and 2 inches on the walls and up to 4 inches on the roof.
I’m not an energy nerd, and the customer and I are in agreement that we’re building a barn and nothing but a barn. In most cases, that clarity helps keep us from having to meet standard compliance levels of insulation for habitable space.
We typically hold the insulation in place with roofing nails and roofing tins; I recently bought Hitachi’s Plasti-Tacker (Hitachi Power Tools, 800/598-6657, www.hitachi-koki.com), which fires a staple through a plastic disk and really takes the drudgery out of this particular task.
OSB. Although we can and have applied cedar shingles or bevel siding right over the foam on the walls using 2-inch-long staples or nails, I prefer to cover the foam with a solid nail base of ½ OSB. To simplify this process, we’ve begun to use rigid foam panels with the OSB already laminated to one face, made for roofing applications but equally suitable for wall application.
The opposite side has a glass-fiber-reinforced asphalt-impregnated facing. I buy the panels from Beacon Sales (Somerville, Mass., 617/666-2800, www.beaconsales.com), a regional roofing industry supplier. The panels are made by Atlas Roofing (www.atlasroofing.com) and are available in two types: Crossvent panels have regular air channels under the OSB facing and preserve the manufacturer’s warranty for asphalt roofing applications but cost about 15% more than nonvented panels. The ACFoam Nailbase panels are nonvented and can be used on walls or under a cedar shingle roof in conjunction with a ventilating underlayment. We lay the panels down tight over the pine planking and nail them to the framing every 12 inches, using annular-ring pole-barn spikes. From there on in, it’s trim, siding, and roofing as usual.
To insulate a wood floor, we lay felt-faced 1-inch rigid foam board over the subfloor and cover it with a second, finish layer of pine, nailing it through to the framing.
The resulting floor is fairly airtight and has a nice resilience underfoot. This method makes it simple to insulate only the upper level of the barn if desired, in which case we leave the end- and knee-walls uninsulated. A good wood stove is the typical heating plant and is generally adequate to keep the space comfortable.
John Millerbuilds traditional New England structures and lives in E. Harwich, Mass.