As soon as the holes pass inspection, I cut five 18-inch lengths…
As soon as the holes pass inspection, I cut five 18-inch lengths of 1/2-inch rebar for each hole.
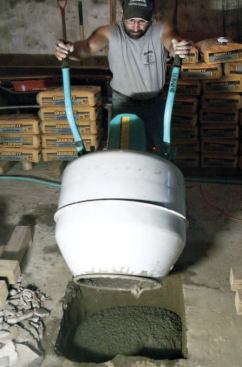
I fill the hole about a third of the way and tamp it with a shov…
I fill the hole about a third of the way and tamp it with a shovel to remove air bubbles.
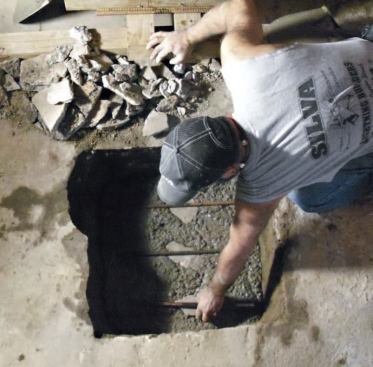
I position the first three pieces of rebar, setting them on top …
I position the first three pieces of rebar, setting them on top of concrete fragments, which helps them stay in place. I lay two more pieces of rebar in the opposite direction, and continue adding concrete until the hole is filled.
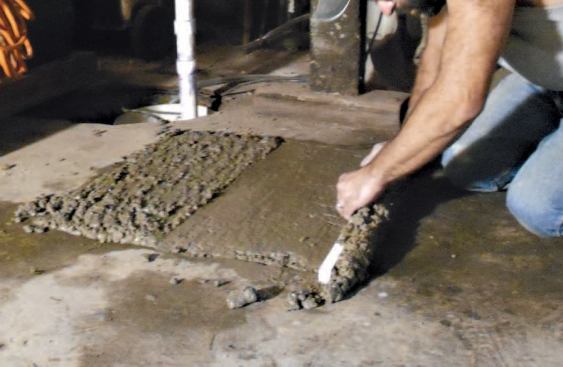
After the mix sets for few minutes, I screed the surface flat wi…
After the mix sets for few minutes, I screed the surface flat with a straightedge, let the water rise, and broom it off. After another few minutes, I lightly tap the surface with the straightedge, then screed it flush with the slab. In a few minutes I brush off any water that rises and let the concrete cure.
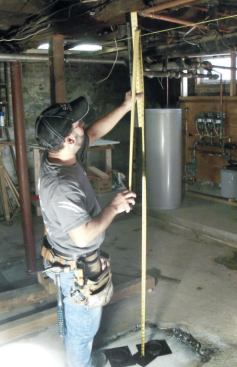
A week passes before I can install the columns. To get a fast me…
A week passes before I can install the columns. To get a fast measurement, I stack the cap and base plates together on the footing and measure up.
I prop the columns in a stable position (generally on horses, bu…
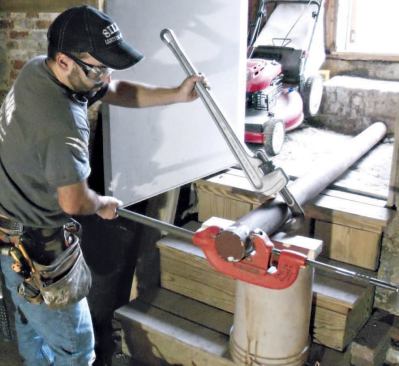
I prop the columns in a stable position (generally on horses, but here I used the basement stairs) and go to work with the cutter and pipe wrench.
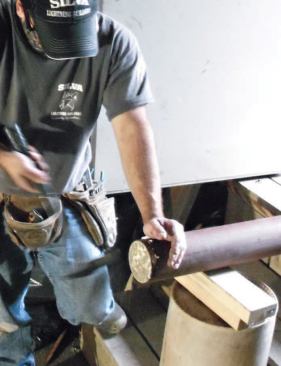
Once the steel is cut, the concrete breaks easily. There's usual…
Once the steel is cut, the concrete breaks easily. There's usually some concrete protruding that I chip away with a hammer.
I then set the cap on top of the column and angle it into positi…
I then set the cap on top of the column and angle it into position on top of the base plate, using a sledgehammer for persuasion.
Pouring the Footings
As soon as the holes pass inspection, I cut five 18-inch lengths of 1/2-inch rebar for each hole, then start mixing the concrete. I’ll fill the hole about a third of the way and tamp it with a shovel to remove air bubbles. I then position the first three pieces of rebar, setting them on top of concrete fragments, which helps them stay in place. I lay two more pieces of rebar in the opposite direction, and continue adding concrete until the hole is filled. After the mix sets for few minutes, I screed the surface flat with a straightedge, let the water rise, and broom it off. After another few minutes, I lightly tap the surface with the straightedge, then screed it flush with the slab. In a few minutes I brush off any water that rises and let the concrete cure.
Cutting and Standing the Columns
A week passes before I can install the columns. To get a fast measurement, I stack the cap and base plates together on the footing and measure up. My Stanley 2-foot straightedge rule comes in handy here, giving me an accurate reading.
I check both ends of each column before marking the cut line – usually one end is cut straighter and flatter, so I want to make my cut at the other end. I prop the columns in a stable position (generally on horses, but here I used the basement stairs) and go to work with the cutter and pipe wrench. You’ve got to pay attention to keep the cutting wheel tracking in the middle of the line. I start with the cutter snug, then increase the cutting depth about a half turn with each revolution.
Once the steel is cut, the concrete breaks easily. There’s usually some concrete protruding that I chip away with a hammer. I then set the cap on top of the column and angle it into position on top of the base plate, using a sledgehammer for persuasion.
1
of 4
Once the column is in place, I use the sledge and my level to fi…
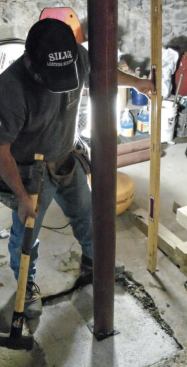
Once the column is in place, I use the sledge and my level to fine-tune the position.
When I'm satisfied the column is plumb, I remove the nearby jack…
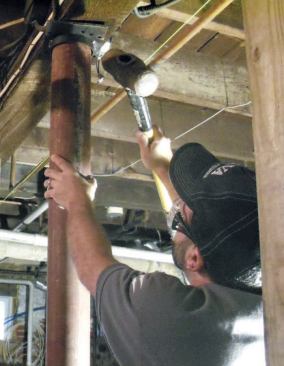
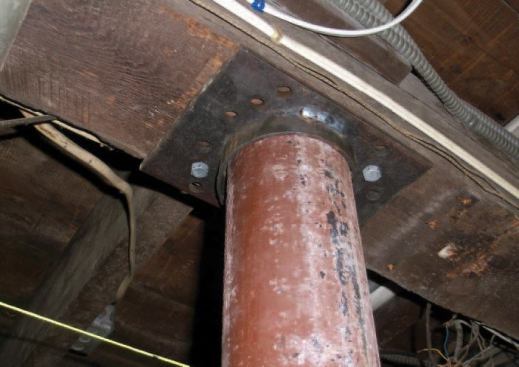
When I'm satisfied the column is plumb, I remove the nearby jacks, putting the weight of the house on top. I run two 3/8-inch-by-2-inch galvanized lag screws into the beam.
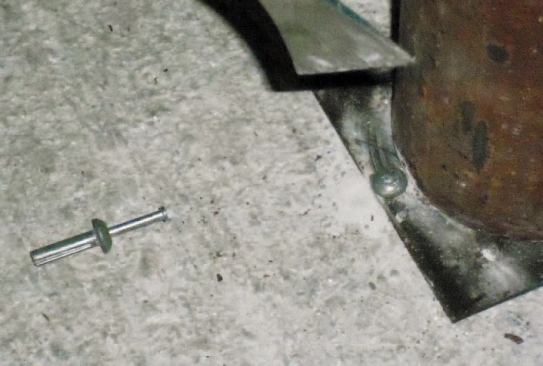
At the bottom, I install a concrete anchor to keep the base plat…
At the bottom, I install a concrete anchor to keep the base plate in place until the new slab is poured.
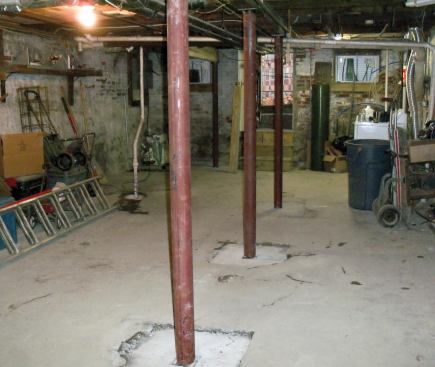
Work like this is not glamorous, but doing it right ensures that…
Work like this is not glamorous, but doing it right ensures that any renovations done upstairs will be properly supported.
Securing the Plates
Once the column is in place, I use the sledge and my level to fine-tune the position. When I’m satisfied the column is plumb, I remove the nearby jacks, putting the weight of the house on top. I run two 3/8-inch-by-2-inch galvanized lag screws into the beam. At the bottom, I install a concrete anchor to keep the base plate in place until the new slab is poured.
Work like this is not glamorous, but doing it right ensures that any renovations done upstairs will be properly supported. This job took me and a helper four days.
Emanuel Silva, a contributing editor to JLC, owns Silva Lightning Builders in North Andover, Mass. He can be reached at silvalightningbuilders@gmail.com.