Craftsman-style window and door casing is defined mostly by the entablature (the horizontal trim) above the jambs, which consists of three separate pieces of molding—the architrave bead, the frieze, and the crown. It may look challenging, but it’s pretty simple because everything hinges on the length of the frieze.
If you follow the flush-cut rule, where the ends of the frieze are flush with the outside edges of the casing (see “A Look at Traditional Trim Designs,” Aug/15), the length of the frieze would then be equal to the outside dimensions (O.D.) of the casings below. If you want the frieze to go past the casings, then add a little more. But be careful: Adding small increments can have a huge visual impact.
Do the layout on the wall
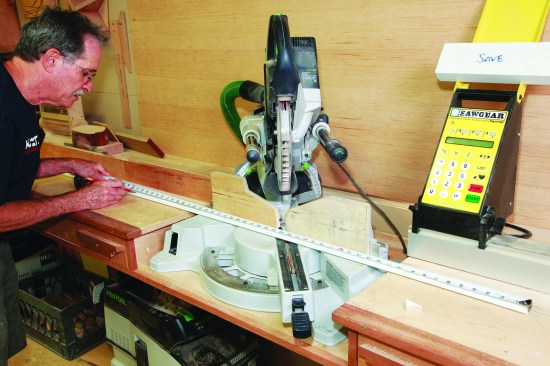
Like many carpenters, I’m challenged by simple arithmetic, so I usually do the layout right on a wall at a door or window opening. I start by pulling a tape measure over 1/4 inch from the face of the jamb and marking the jamb reveal. Next I measure over the width of the casing, in this case 4 1/4 inches. I do the same thing on the opposite side of the jamb and then measure the O.D. of the casing.
For my home, I added 3/4 inch to that measurement so that the frieze would cantilever 3/8 inch beyond both edges of the casing. This meant that for all of my doors and windows, I added 9 3/4 inches to the width of the opening to get the length of the frieze. So the frieze for a typical 2/8 door would measure 41 3/4 inches.
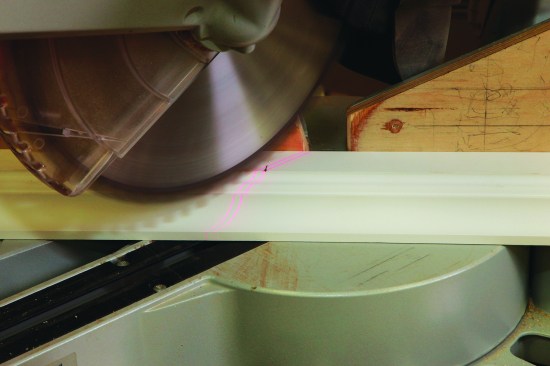
The length of the architrave bead and the head cap or crown is easy to figure—just add for the cantilever on each end of the frieze. I usually make that cantilever 3/8 inch, making both pieces 3/4 inch longer than the frieze. Measuring the architrave bead is easy, but measuring the crown can be a bit tricky. Be sure to measure from the long point of the miter where it passes through the bottom fillet (more on that later).

Gary Katz
When cutting the small return cap of the architrave bead, I slid…
Cutting the pieces
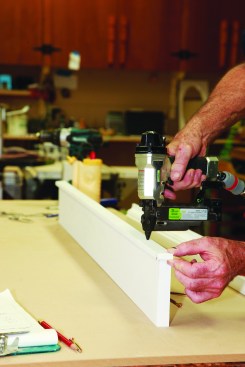
For stain-grade work, the frieze can be butt-cut, which exposes the end grain, a look that I like. For paint-grade work, the frieze can also be butt-cut and then sanded carefully. Alternatively, it can be cut with a self-return, which eliminates sanding and guarantees a smooth finish. But I was in somewhat of a hurry, so I butt-cut all of my frieze boards.
If you decided to self-return both ends of the frieze, remember to cut the little return caps first. Cutting them from a long piece of stock is much safer than working with a short scrap.
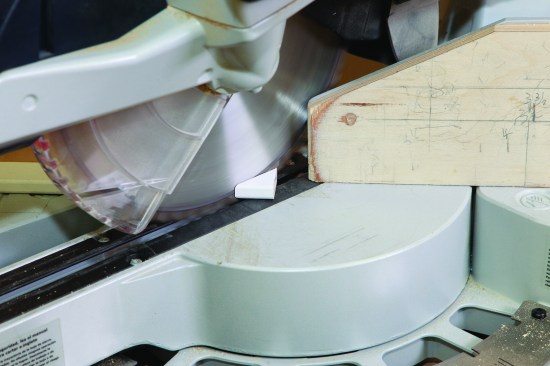
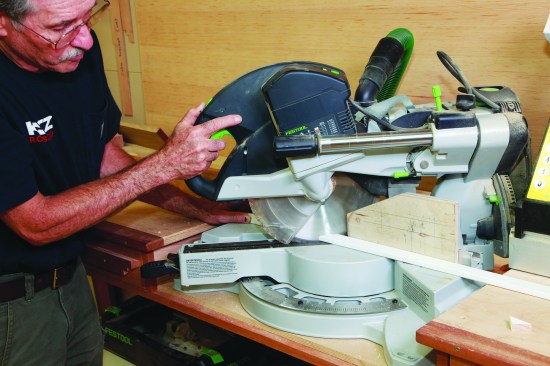
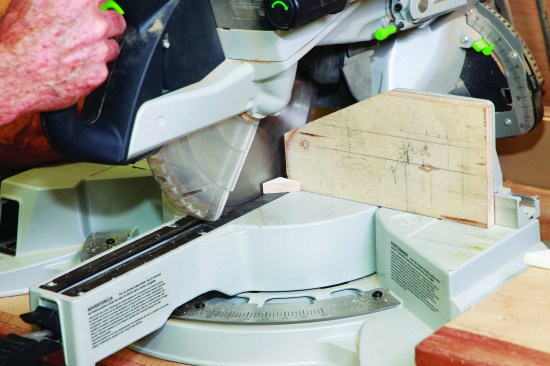
Once the frieze is cut, I move on to the architrave bead. I start by cutting the return cap. Because this piece is very small and weighs next to nothing, the wind from the miter-saw blade can suck the piece into the blade and ruin it. To keep this from happening, I slide the miter-saw fences on my Kapex saw in as close to the blade as possible. For other miter saws, use a zero-clearance fixture to cut the small self-return pieces.
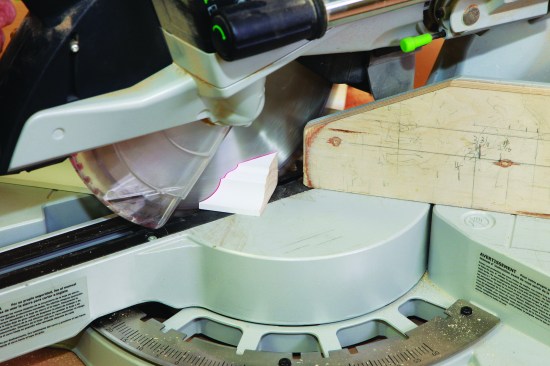
After cutting the first return cap, swing the saw and cut the miter in the opposite direction. Then hook a tape on the long point of the miter and measure to the opposite long point for the overall length of the bead. After cutting that miter, flip the waste material over and cut a miter in the opposite direction. Finally, swing the saw to 90 degrees and slice off the other self-return cap.
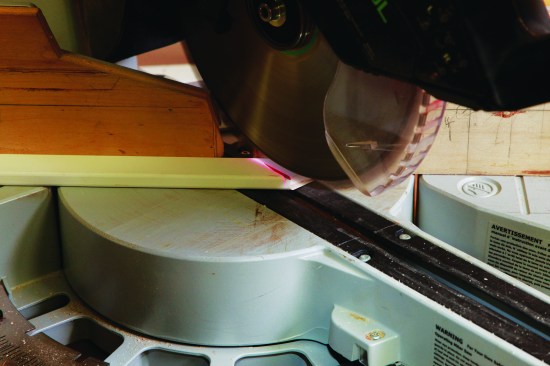
I always cut crown molding upside down on my saw. Of course, if the material is too big to stand against the fence, I lay it down and cut it on the flat. But this crown is pretty small and can be cut easily in position. Because this profile has a solid back, it can be cut right-side up, but don’t be tempted. One of the main reasons I cut the material upside down is so I can see the measurement marks, which are usually made on the bottom of crown molding and almost never on the top. With the molding positioned upside down, it’s also easy to align the miter-saw blade with the measurement marks.
Like the architrave bead, I cut the first self-return cap, then I swing the saw and cut an outside-corner miter. Next, I hook my tape measure where the long point cuts through the bottom fillet on the molding. At the opposite end of the molding, I mark the measurement on the same part of the profile, where the miter will pass through the bottom fillet. As before, I then make the final miter cut and cut the other return cap from the waste.
Assemble the pieces on the bench
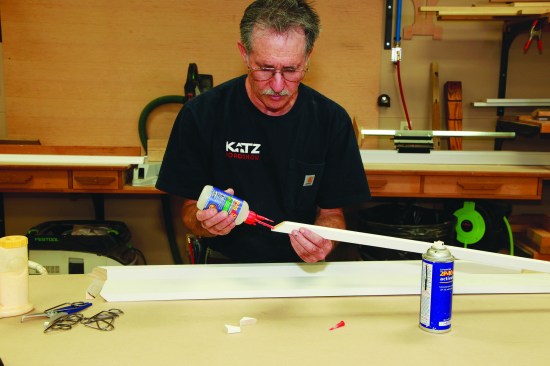
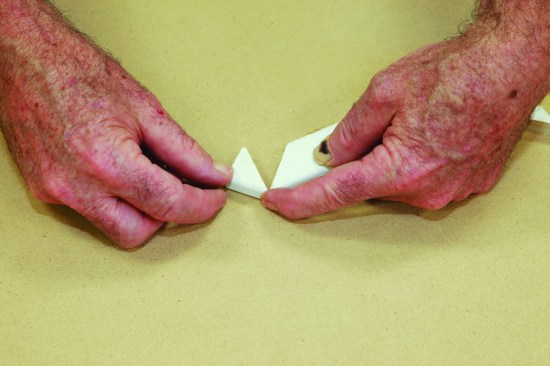
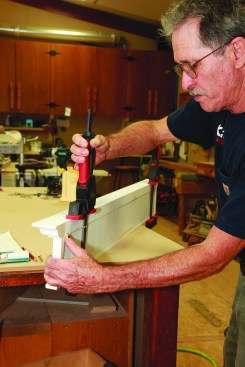
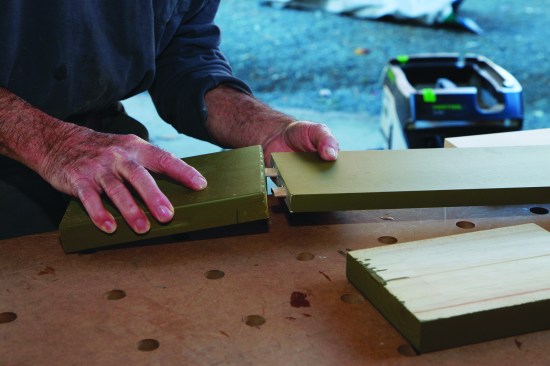
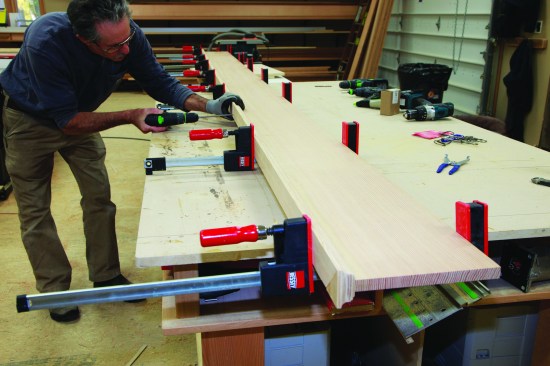
Once all the pieces are cut, I start the assembly. For all the small self-returns—on the frieze (if I’m self-returning the ends), the crown, and the architrave bead—I use 2P10 cyanoacrylate glue because it sets immediately and no nails are required. Firing pins into tiny self-returns—right near your fingers—might provide job security for the folks at urgent-care clinics, but for finish carpenters, it can be dangerous and painful. This glue allows me to assemble small pieces and then, if it’s necessary, reinforce the joinery with 23-gauge pins without having my fingers near the joint. I put the glue on the larger piece and spray the smaller piece with activator. Then, because the glue sets so fast, I “hinge” the joint closed to align the miter perfectly.
I use the same process with the crown and the architrave bead. As soon as the glue sets, I spray any squeeze-out, too, then peel it off with a sharp chisel.
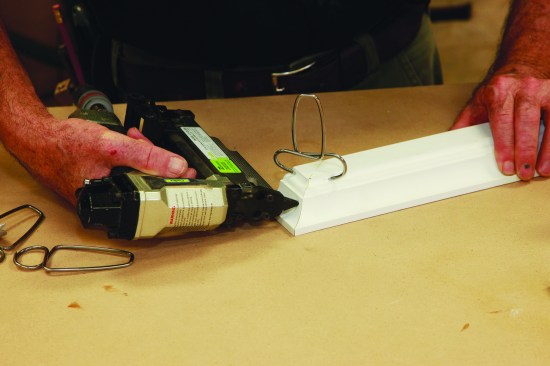
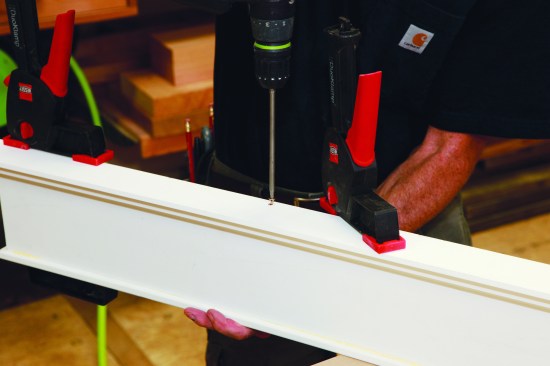
The miters on the crown molding usually require some adjustment, so to assemble those pieces, I use yellow glue, which provides more wiggle room to get the joint perfect. Once I have the joint aligned, I secure the miter with a spring-loaded miter clamp, then fire 1-inch 23-gauge pins to secure the moldings.
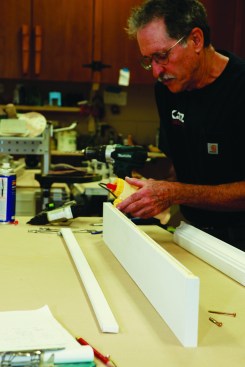
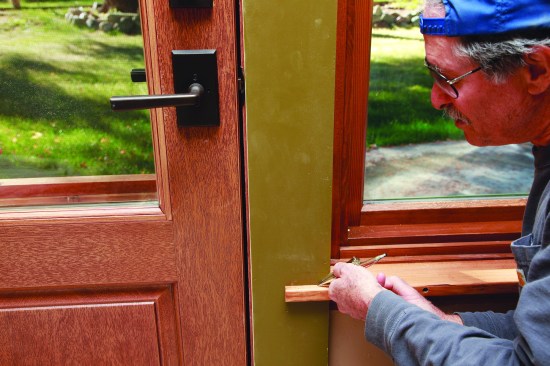
With all the self-returns assembled, I apply glue to the bottom of the frieze and fasten the architrave molding, using my fingers to make it flush with the back of the frieze and make the cantilever equal at both ends. I secure that thin molding in place with 1-inch 23-gauge pins as well.
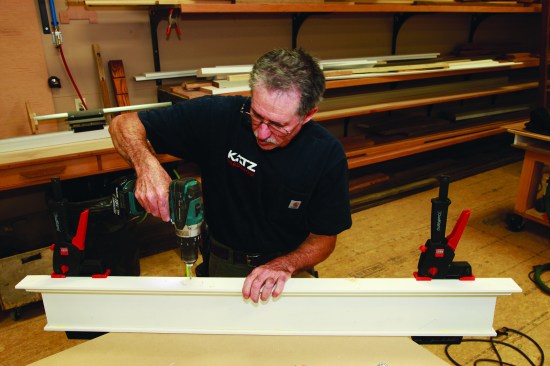
Attaching the crown to the frieze board isn’t quite as easy. I learned a long time ago that shooting long nails through the top of the crown and down into the frieze is risky. Too often, one of the nails will follow the grain and pop out through the face of the frieze. That can be tough to fix. Even if you fill and carefully sand the wound, a shiny spot can still show up in the finished trim work. Using clamps and screws is much safer, and the results are far more pleasing and predictable.
After applying a thin line of glue to the top of the frieze, I clamp the crown to the frieze, again using my fingers to be sure the crown is flush with the back of the frieze and proud an equal amount at each end. Then I predrill clearance holes for the screws, using a bit that’s slightly larger than the diameter of the screw threads. The screws don’t bite into the crown, but draw the crown to the frieze board instead. If the tops of the door and window heads can’t be seen, I use regular square-drive screws to secure the crown; if the tops of the entablatures are visible, I use trim-head screws.
Gary Katz
I centered the entablature above the opening and tacked it to th…
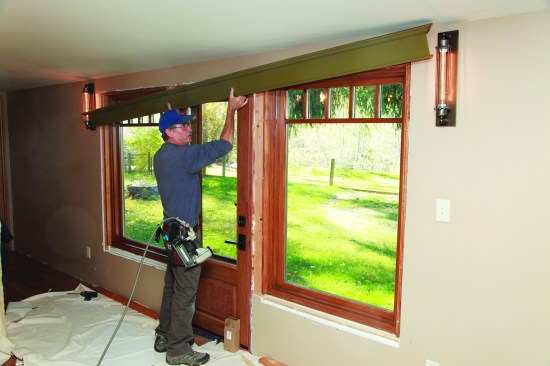
Working from the top down
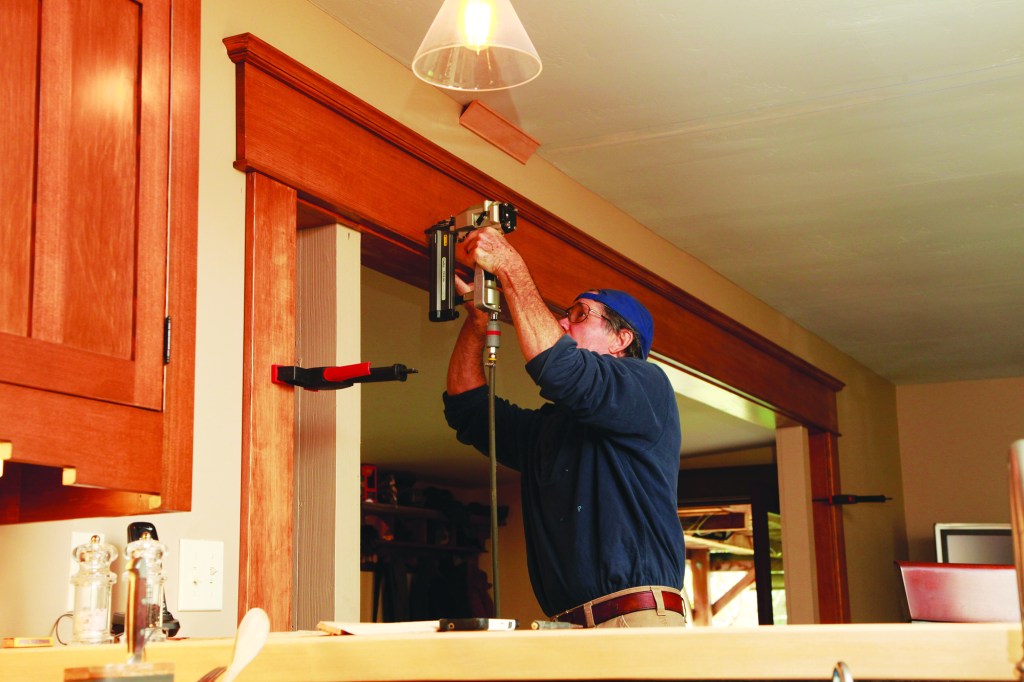
I prefinished all the trim in my home, and because the door and window jambs had all been sealed with Quad foam, I didn’t depend on the casing to secure the jambs. So first I squeezed a small bead of PL Premium on the back of the trim and then I nailed all the moldings only to the walls using 18-gauge brads. To pull the casings tight to the jamb, I tacked them with 1-inch brads.
Though it might be easier to install the plinth blocks first, then the side casing, and finally the entablature—starting from the bottom and working up is usually a smart approach—on my home, I started at the top, installing the entablatures first, and then worked down. (That habit probably stems from the method I use to install mitered casing). I centered the entablature above the opening and then tacked it to the wall with a 1/4-inch reveal along the jamb.
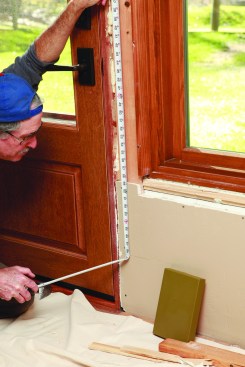
Next I traced a line across the top of the plinth block on each side of the doors, and measured down from the head casing to the plinth-block line. I cut the casing to fit a little snug and mortised the bottom of the casing and the top of the plinth block for two Festool Dominoes. It wasn’t necessary to install tenons in the top of the casing—the wall supported the entablature, and the casing legs lay pretty flat near the head. But at the bottom of the jamb, the plinth blocks rode on a narrow section of wall and tended to rock a little. The Dominoes prevented the plinth blocks from tipping and skewing the reveal at base of the casing.
Plinth blocks are an essential element to a Craftsman-style doorway—without them, the casework isn’t complete. I used plinth blocks on all the door jambs (except inside the closets)—paint-grade and stain-grade alike. The width of the casing varied from opening to opening: The casing on the entry door was mull casing (shared with the windows), so it was 4 1/4 inches wide; casing on the standard doors was all 3 1/2 inches wide, while the casing on the stain-grade opening to the living room was 5 1/2 inches wide. That meant that the plinth blocks also varied in size, each of them 1/4 inch wider than the casing, for a 1/8-inch reveal on each side.
The Sills
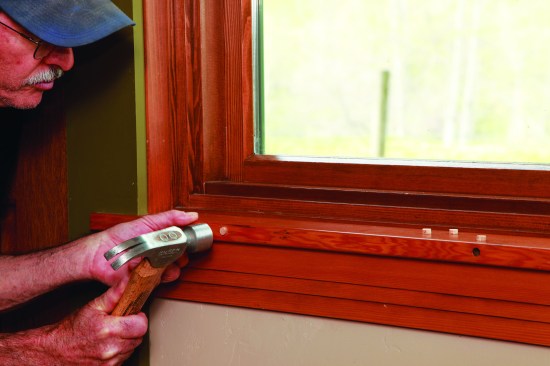
Once the casings were installed, I tackled the windowsills; some needed to be scribed to fit where they lapped over the casing. The sills were too wide to secure with nails, so I predrilled clearance holes, screwed in place, and plugged the holes.
Stain-grade Trim
I love wood, particularly Douglas fir. But with the Douglas fir windows and doors, I knew I couldn’t use Douglas fir casing around all the interior openings—that would be too much wood and the impact and beauty of the wood would be lost. Instead, I opted to install paint-grade trim around most of the windows and doors.
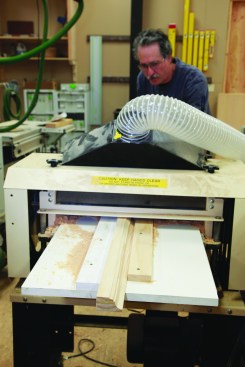
For the 12-foot doorway between the dining room and the living room, however, I used all stain-grade finish material. I milled the crown molding on my Woodmaster Planer/molder so that it would match the standard WindsorOne profile that I’d used throughout the house. Then I assembled the entablature the same way I did for the paint-grade work, using fasteners judiciously.