All photos by Sue Burnet
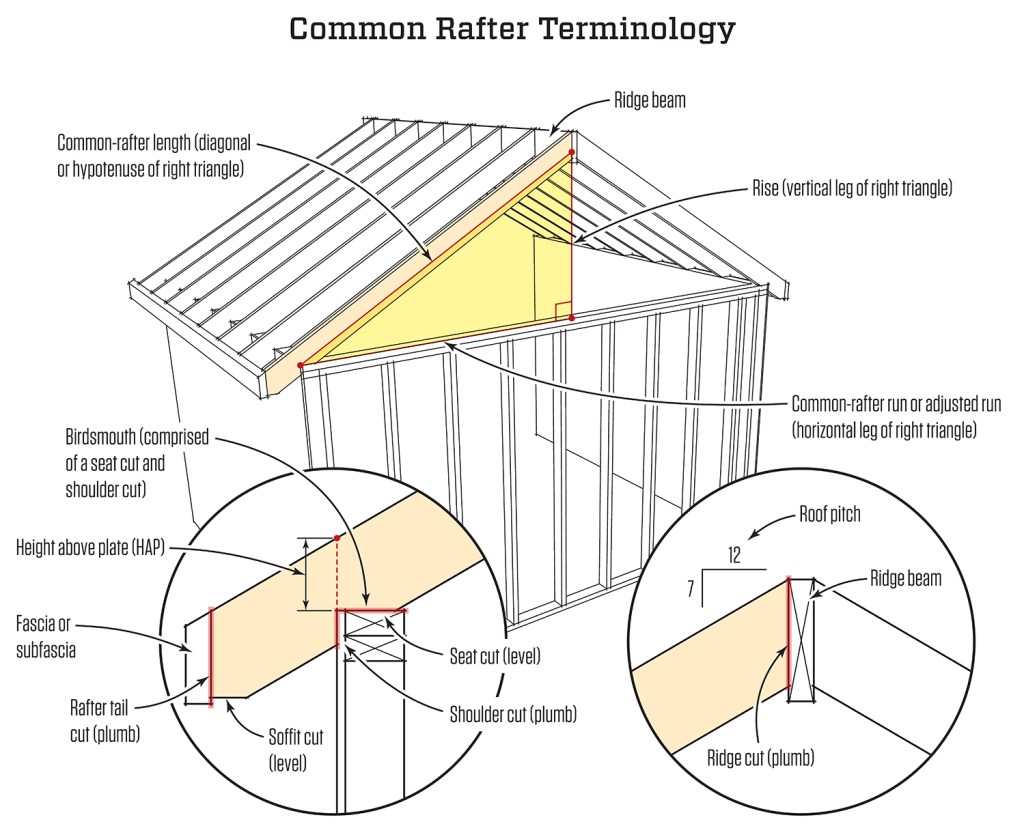
Next, we’ll look at the steps to cut a common rafter. In the photo sequence below we’ll follow through with cutting the rafter for the shed roof, which we calculated to 82 3/4 inches long.
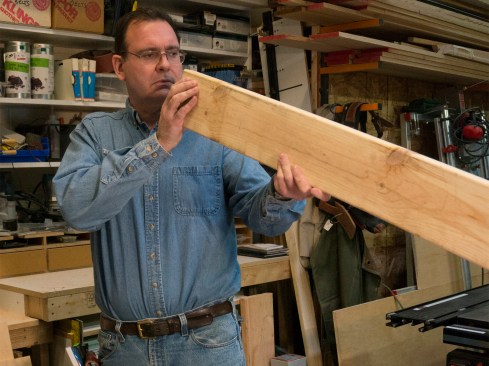
Rafter stock. I start by selecting material that’s as straight and free of twists as possible. Even good lumber usually has a bit of a crown, so I sight down the edge of the material, and place a mark pointing to the edge where the crown faces up. We will install the rafters with crowns facing up, so I place that side towards me on a bench or sawhorses.
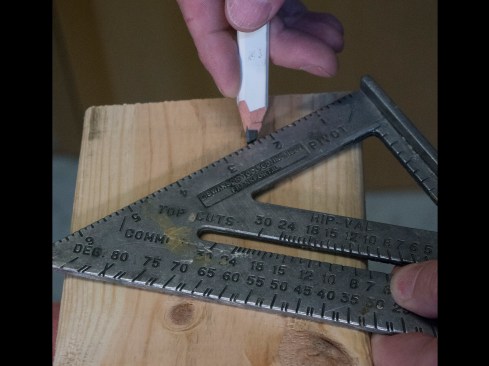
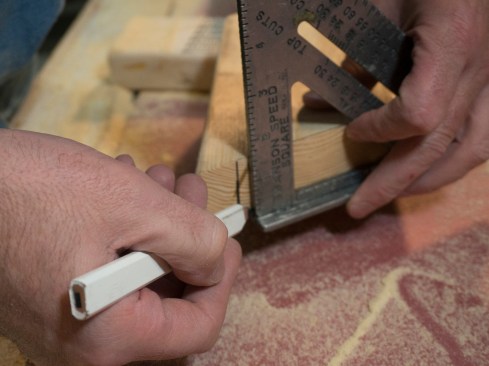
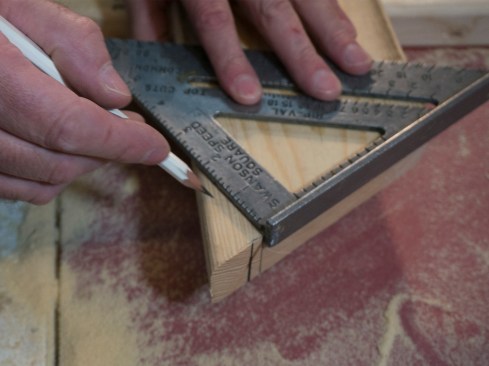
Plumb cut. I mark a plumb cut on the end of the rafter that will butt the ridge or ledger board. To do this, I line up a my square on the top edge of the rafter and pivot it until the appropriate slope mark (“7” on the square’s “Common” scale for a 7:12 roof) lines up with the board’s edge. Using a sharp pencil, I strike a line, and I use a circular saw with a good blade to cut this plumb line.
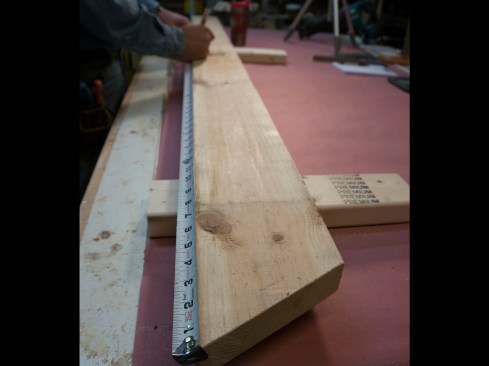
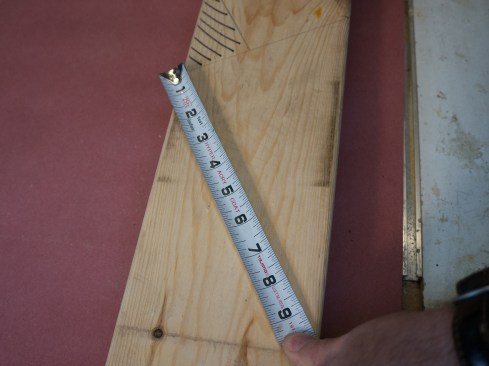
Rafter length. I can now hook a tape measure on the long point of this plumb cut and measure for the length of the rafter.
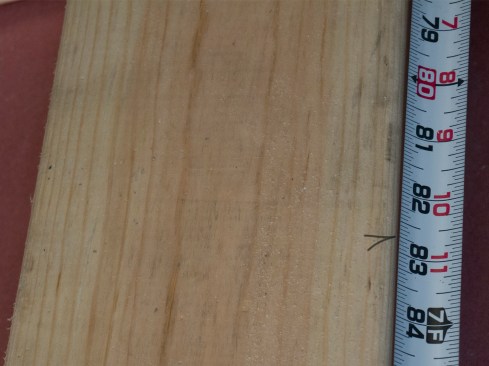
Based on the calculation we made earlier for the shed roof example, the rafter length is 82 3/4 inches.
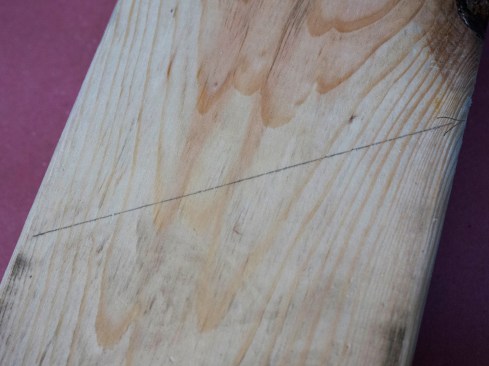
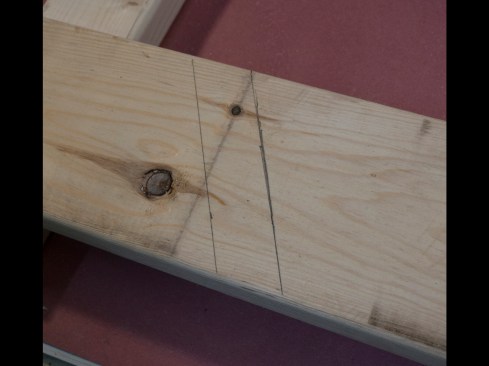
Birdsmouth. Place a square at the 82 3/4 -inch mark, and draw another plumb line, parallel to the top cut. This line represents the shoulder of the birdsmouth.
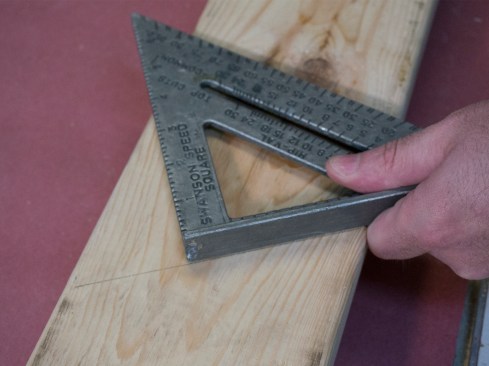
Seat cut. Set the flange of the square on the plumb line that marks the birdsmouth shoulder, and slide this flange to the approximate depth of your seat cut (following the 2/3 rule). In this case, the width of the carrying beam we are bearing on is 3 1/2 inches, and that’s close to what we end up with for the length of the seat cut.
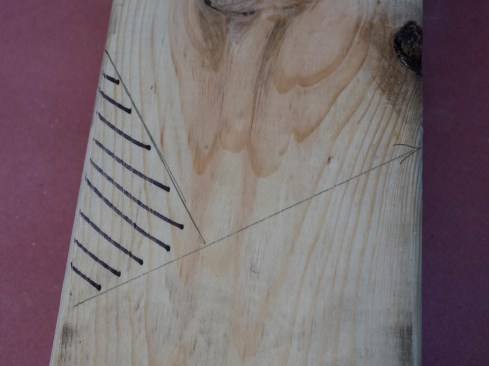
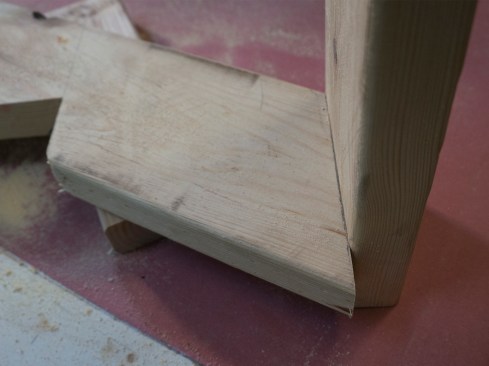
But the birdsmouth doesn’t need to have full bearing. On a steeper roof, it will be shorter; on a shallower roof, the seat cut will be longer. The birdsmouth (the area identified above with black hatch marks) can be cut now, but I usually wait until I have laid out the tail cuts.
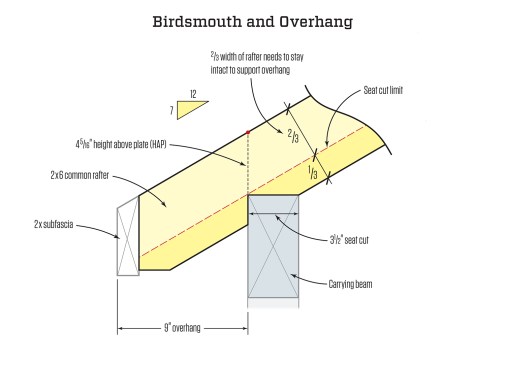
Birdsmouth depth. Whenever a roof has an overhang, you don’t want to cut too deep a birdsmouth. As a general rule, you want to leave roughly two-thirds of the width of the rafter stock intact to support the overhang. In this case, we have 2×6 rafter stock, so we want to leave roughly 3 5/8 inches (it doesn’t need to be exact). This is measured square to the board, not along the plumb line.For a more detailed discussion on rafter birdsmouths, see "Sizing the Birdsmouth," May/10.
Tail cut. In our example, the roof has a 9-inch overhang as measured on a level plane from the building (see Roof Plan, page 1). I lay this out by measuring horizontally across the rafter from the birdsmouth shoulder. I mark a plumb line here using the layout square, the same way I did for the top cut and for the shoulder of the birdsmouth.

Boxed eaves. If we had open eaves, I would cut the rafter ends plumb on this line. In our case, however, we will have boxed eaves, and the ends of the rafter will be tied together with a 2×6 subfascia. So, using a scrap of 2-by material, I just draw a line 1 1/2 inches back from the plumb line.
This photo shows the plumb cut I measured 9 inches away from the birdsmouth and the line I drew to shorten the tail for the subfascia.
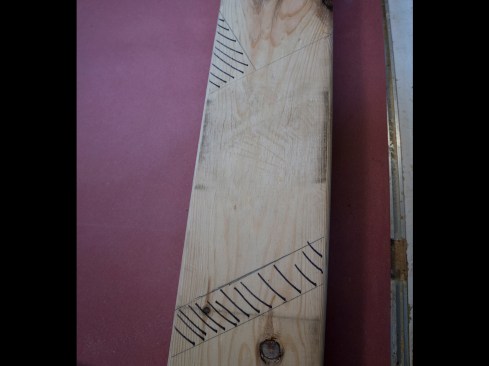
In this photo, I have used black hatch marks to note where the subfascia will land relative to my rafter. I can now make this plumb cut, chopping off the hatch marks.
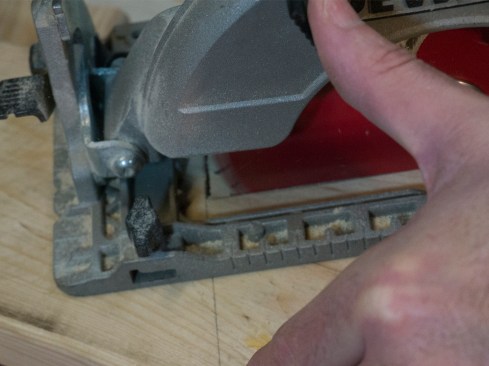
Cutting the birdsmouth. With the saw out, I also cut the birdsmouth. The birdsmouth is a stopped cut, or notch. It’s important not to overcut the lines, as doing so can weaken the rafter.
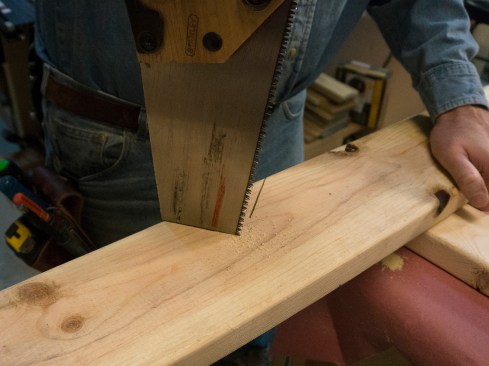
When using a circular saw, stop the cuts right at the intersecting marks of the plumb and seat lines and finish the cuts with a hand saw or jigsaw.
Soffit cut. The plumb cut at the end of the rafter is longer than the 2×6 subfascia is wide. Therefore, I want to cut off the long point of this plumb cut so it doesn’t protrude below the subfascia or interfere with the soffit material. Hold a scrap of the subfascia material in position and mark the bottom edge.
I also deduct another 1/4 to 1/2 inch to be sure that none of the tails will extend into the finished soffit. Holding a a square on the end of the rafter, I strike this mark.
To make the soffit cut, I hold my square on the plumb cut, and mark a “level” line square to the plumb cut.
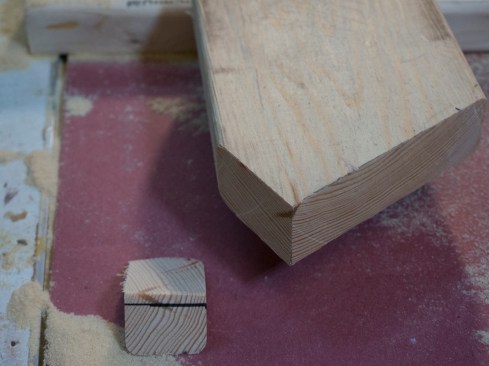
The final tail cut is made along that line, and the resulting rafter can be used as a pattern to lay out all the other common rafters.
To learn more about framing roofs, explore the JLC Framing Workbook.
Got a Comment?
Click here to submit a Letter to the Editor. We value all comments, corrections and questions.
If we think others will benefit, we may publish it in print. Letters should be exclusive to JLC, Professional Deck Builder or Tools of the Trade. We do not publish open letters or third-party letters. Writers of letters selected for publication will be notified. Letters may be edited for clarity and shortened for space.