
Finishing Off the Deck
With the two deck sections framed, we began to install the ipe decking on the “high” deck. First, we applied strips of peel-and-stick flashing to the top of the framing members to help extend the lifespan of the PT wood. It’s a little bit of a belt-and-suspenders assembly, but ipe lasts longer than pressure treated wood, so we deemed it worth the effort.
Cutting. Due to the site’s steep topography and the height of the deck off grade, we set up our cutting station on level ground at the north-facing front of the house. Unfortunately, this was a long hike back and forth through the length of the house for our cut guy, which added time to the job. Immediately after the decking was sawn and prior to lugging it to the install area, we sealed the cut ends of the ipe with Ipe Seal (deckwise.com).
Fastening. We face-fastened the ipe to the framing with 2 1/2-inch-long stainless steel coated trim screws (fastenmaster.com), which were color matched to the ipe. After running a perimeter band of decking, we started applying the field boards, working from the outer edge towards the house (Figures 6, 7).
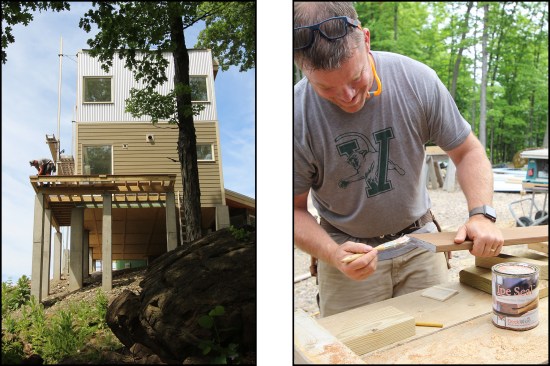
Figure 6a. The ipe decking was installed on the elevated deck area first (left). Cut ends were sealed with Ipe Seal (right).
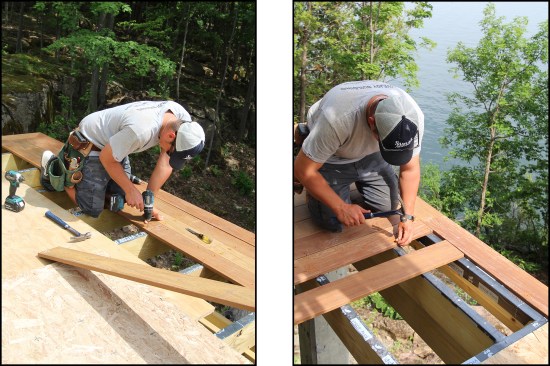
Figure 6b. The decking was predrilled for stainless steel trim screws (left). A couple of 8d nails helped uniformly gap the boards (right).
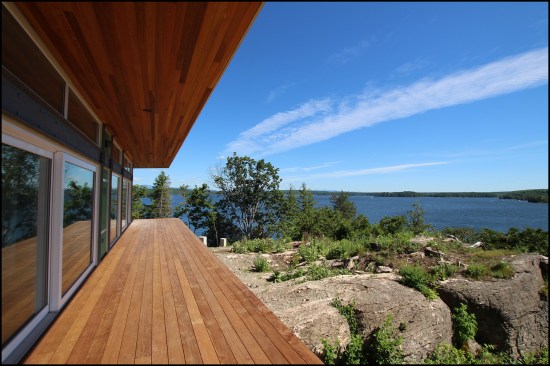
Figure 7. The south elevation was 80% glass. Large high-performance European-style lift-and-slide glass doors set in a steel moment frame (left exposed as an architectural feature) opened onto the ipe deck.
Because of the visible fastener pattern, we predrilled holes and carefully aligned them using a layout square, placing two screws at each joist. To uniformly gap the 1×6 boards, we temporarily tacked a couple of 8d nails into the framing at each course, then set the deck screws with an impact driver. Then we removed the temporary spacer nails, repeating the process until we reached the exterior wall.
Deck to wall. Where the decking meets the exterior wall, we installed a 2-inch-wide strip of Boral trim with metal cap flashing. The cap’s vertical leg runs up the Zip sheathing and is taped off with Zip System flashing tape, while its prominent 45-degree kickout directs water away from the deck-to-wall juncture.
The home is clad with a mix of fiber-cement and Galvalume siding. For an extra layer of water protection, we installed Hydrogap drainable housewrap over the Zip System sheathing in preparation for the home’s rainscreen siding (1-by strapping was installed over the Hydrogap). The drainable housewrap laps over the cap flashing’s vertical leg.
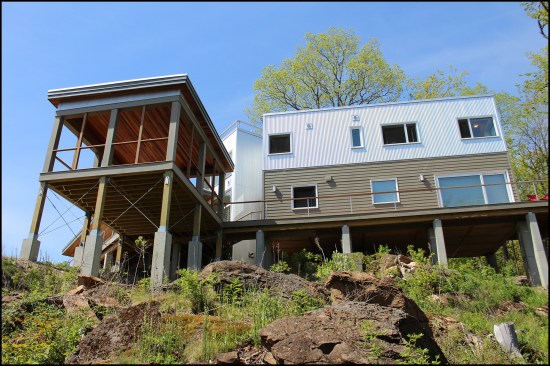
Guardrails. One of the last tasks of the project was to install guardrails on the two deck sections. Like most people who have invested in homes with spectacular views, our clients wanted their views, of Lake Champlain, to be as unobstructed as possible. They didn’t want to sit in their chairs—whether on the deck or on the inside—staring at a railing and an array of balusters. So, we installed a custom-built guardrail system with stainless steel posts and cable railing.
We used 1-1/2-inch-thick ipe stock for the cap rail, which we dadoed to fit over a stainless steel subrail. Local town code allows for 36-inch-high guardrails, which helped keep the rail out of view lines. The posts were set with stainless steel lag bolts set into solid framing (Figure 8).
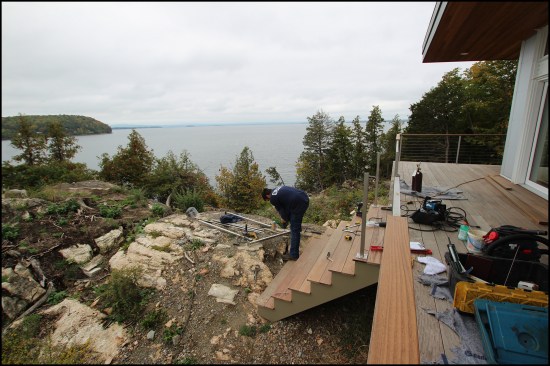
Figure 8a. A custom-built guardrail with cable railing was installed.
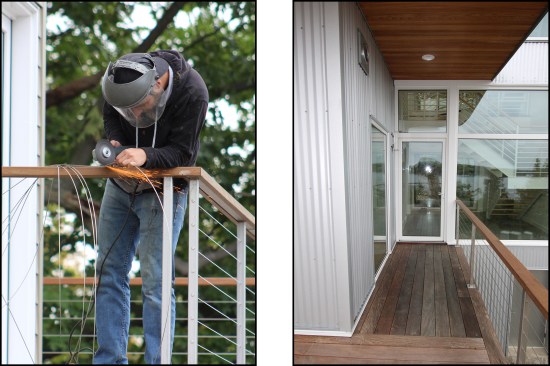
Figure 8b. The deck was temporarily treated as two separate decks with code-approved guardrails (left, right).
Guardrails and decking were reconfigured during the pavilion work.
Because we ended up building the pavilion and middle portion of the deck connecting the two decks a year and a half after the house was completed, we needed to reconfigure the guardrails and change the orientation of the decking in some locations to avoid a patchwork look. We reused as much of the expansive rail system as we could but had to install a few new sections. Last, we pressure-washed the older decking, which brought a lot of the color back, then sealed it to match the new. There was slight difference between the two, but I think the ipe is going to weather evenly over time. You can see aerial views of the finished project by clicking on the video below.
Photos and illustrations by Tim Healey, drone video and photographs by Nate Hayward