Interior Air Barrier
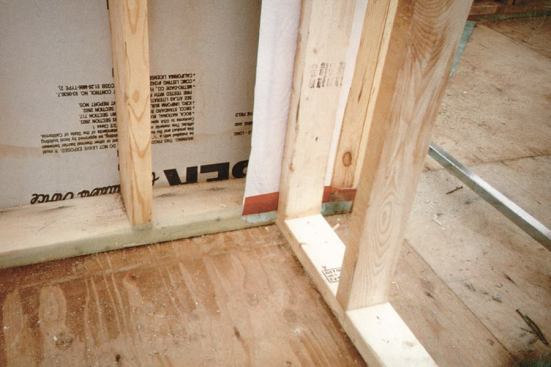
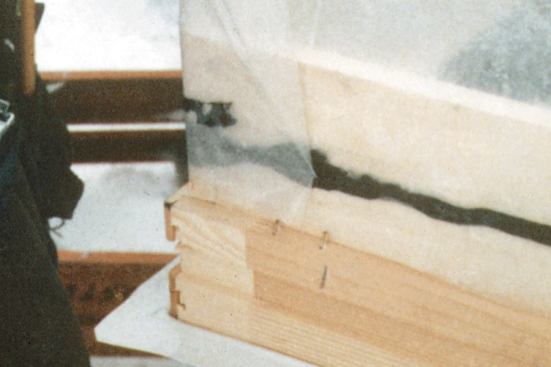
Once our walls are insulated, we install a layer of Tu-Tuf poly over the Insulweb on the inside of the exterior walls, sealing the seams with tape or Tremco. This layer is also sealed to the flap of Tenoarm sticking out from under the bottom plate. (We don’t continue the Tenoarm up the walls because it’s too thick to form neat inside corners.) Where partitions intersect exterior walls, we install a 2×6 or 2×8 backing stud as a drywall nailer, followed by a strip of Tu-Tuf, which is also taped to the Tenoarm flap.
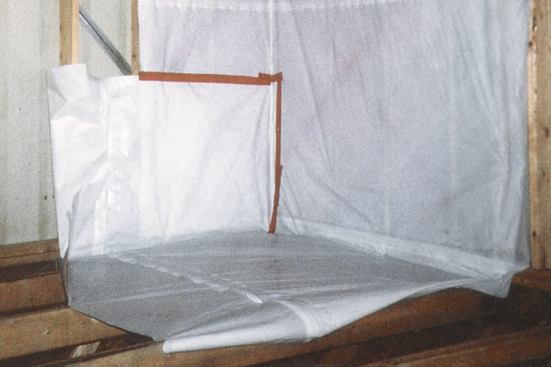
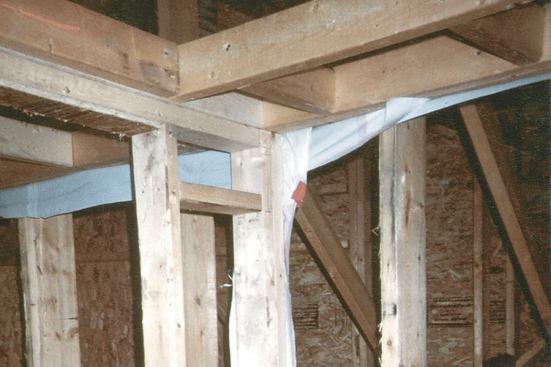
On the top floor, we prefer to install a continuous layer of poly on the entire ceiling before the partitions go up. To minimize damage to the ceiling poly, we carefully position the partition top plates against the ceiling joists and drive the bottom plates home with a sledge. Any accidental tears in the ceiling poly get repaired with tape.
If a tub-shower unit is located against an exterior wall, fiberg…
Install carefully, then cut. Once all of the interior partitions are installed, I go to each second-floor room and cut up the ceiling poly. Considering the care with which it was installed, this may seem strange — but if I don’t cut it, I know the electrician will. I cut around the perimeter of the ceiling poly at three of the walls, roll up the plastic, and leave it hanging against the wall on the uncut side. I leave enough plastic at the perimeter of the room to give us something to tape to when it’s time to put the ceiling poly back up.
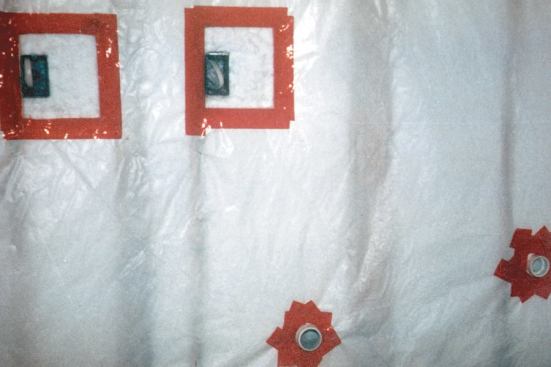
In a home with a bearing wall, where it’s not possible to install the ceiling poly in one piece, we install it room by room. Each partition needs to have a strip of poly above the top plate, and any penetration of the ceiling poly needs to be carefully sealed with tape or aerosol foam.
Chimney penetrations. A gas or wood-fired zero-clearance fireplace can work well in a tight home, as long as the fireplace has glass doors and ducted combustion makeup air. Equally important, the customer needs to understand that the fireplace is there to look at, not to serve as a significant heat source. Where a metal chimney penetrates the ceiling poly, we install the chimney manufacturer’s metal firestop collar. We cut the poly 2 inches away from the chimney and seal it to the metal collar with tape. The gap between the chimney and the firestop collar is sealed with high-temperature GE silicone caulk, available from fireplace dealers. High-temperature caulk is rated for use up to 400°F or 500°F.
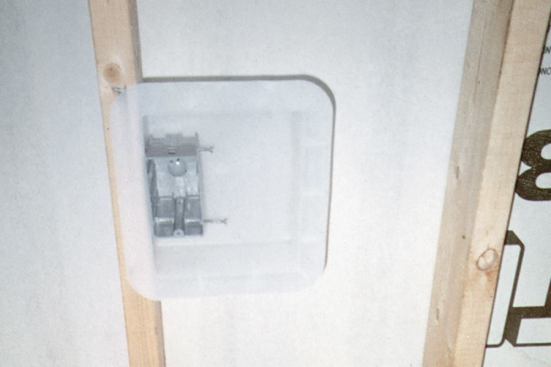
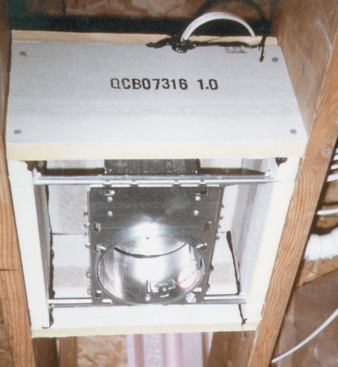
Ceiling-mounted electrical boxes. I stopped using commercially available “airtight” recessed can fixtures when blower-door testing showed that they leak like sieves. Now I use standard recessed can fixtures and install them in a site-built foam box made from scraps of 1-inch or 2-inch rigid foam with seams sealed with tape or Tremco. I size these boxes to provide at least 2 inches of free air space on all sides of the recessed fixture. We seal the ceiling poly to the edge of the foam box with Tremco. In the attic, we blow 22 inches of cellulose over the top of the box. We have never had a light fixture overheat using this system.
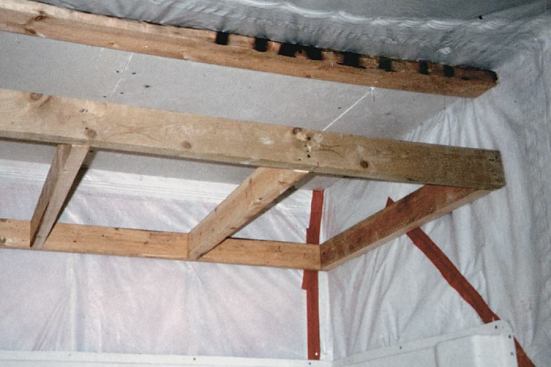
Another way to keep ceiling-mounted electrical boxes from penetrating the poly air barrier is to frame a secondary ceiling below the poly. A closet ceiling or the ceiling above a tub-shower unit can often be lowered to 7 feet or 7 feet 6 inches.
Attic access hatch. I make my attic access hatches out of 3/4-inch plywood with 8 inches of foam glued to the top. The hatch sits on the jamb, which is fitted with rubber bulb-type weatherstripping. Each hatch is closed with two casement window latches, which I buy from my local Weather Shield dealer.
Windows and Doors
My minimum spec for window glass is 5/8-inch insulated low-E argon-filled glazing. I’ve had good success using Pella aluminum-clad wood windows. If the customer chooses optional removable interior glazing panels, the windows are effectively triple-glazed.
Before installing a window, we put a bead of Tremco around the outside of the frame or the extension jambs. Then we attach a 6-inch-wide strip of 6-mil poly to the window frame, stapled through the Tremco every 6 or 8 inches. Adding a 1-inch strip of duct tape over the poly helps prevent the staples from pulling through. It’s important to provide a generous bunch of poly at the corners of the window, so the poly can later be folded back flat. To provide slackness at the corners, we extend the strip of poly around a window corner, double back around the corner, and then return a third time. This provides a kind of poly bib around the window frame. The bib extends toward the interior and is folded flat against the studs when the window goes in. Later we install Tremco between the bib and the main poly wall air barrier. The pressure of the drywall against it makes an effective seal. An exterior door gets the same type of bib, except that it is installed on three sides, not four. Before the door gets installed, we put down a bead of Tremco under the sill. Later, we squirt some aerosol foam under the sill as well. Sheathing, Housewrap, and Siding I sheathe my houses with 1-inch rigid foam — either polystyrene or polyisocyanurate, depending on current foam prices. In my area, the code allows walls to be braced with metal T-bracing, although code officials in many areas of the country require plywood or OSB sheathing, at least at corners (see “Bracing Foam-Sheathed Walls,” 4/93).
I attach plastic housewrap through the foam sheathing with 1 1/2-inch staples into the studs. After losing a lot of Tyvek to wind, I switched to Rufco- Wrap, which is both cheaper and stronger.
Most of our buildings get vinyl or horizontal cedar siding, nailed through the foam sheathing to the studs. Since windows with wide exterior casing can be hard to integrate with foam sheathing, I have developed a detail that works well for me: I butt the cedar clapboard to the window frames, and install the wide casing on top of the siding. Because this detail requires no caulk, it looks better to my eye than butting the siding to the casing.
Hvac
These days, most customers want central air conditioning, so all of my homes use ducts for heat distribution. I have had good success using the Lennox CompleteHeat, a hydro-air system that provides both domestic hot water and space heat. The heating unit consists of a water heater coupled with a fan-coil unit to distribute hot air through a duct system. We try to keep as much of our ductwork inside the building envelope as possible. When ducts must run through the attic, we use insulated flex duct buried under 22 inches of cellulose. Where a duct penetrates the ceiling poly, we carefully tape the air barrier to the flex duct. Every metal duct joint gets sealed with duct mastic. A tight home requires good mechanical ventilation. All of my homes include a heat-recovery ventilator (see “Installing a Heat-Recovery Ventilator,” 1/02). Because they are so quiet, my favorite HRVs are those made by Venmar.
My customers are usually delighted to live in a tight, well-ventilated home with low energy bills. Word-of-mouth referrals from satisfied customers make up a large percentage of my leads and keep me as busy as I want to be.
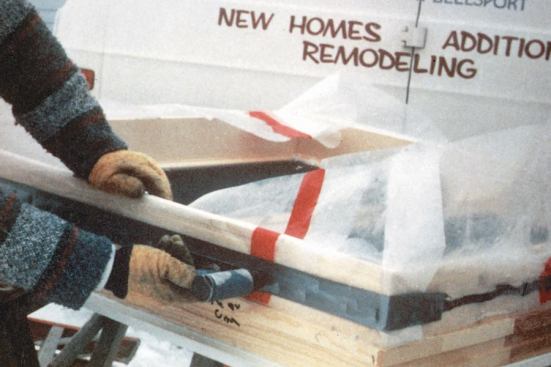
Steve Lentz is a builder from Campbellsport, Wisc. He is a life member of the Energy and Environmental Building Association (EEBA) and a past president of the Builders Association of Fond du Lac and Dodge Counties.