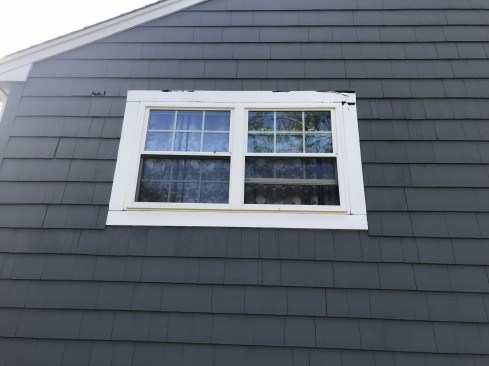
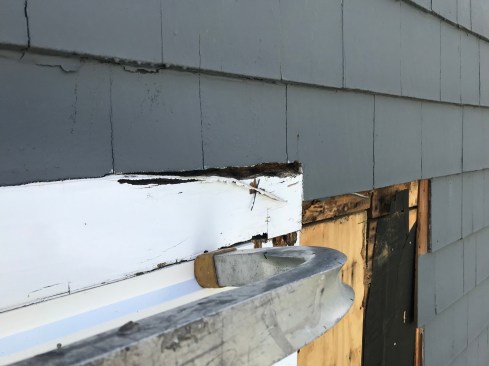
I seem to get a lot of calls to fix windows with rot around them. The most recent case was a second-floor window that had been replaced just seven years earlier. While the vinyl-clad window itself seemed sound, the head casing and the top of one side casing had rot that I could see from the ground.
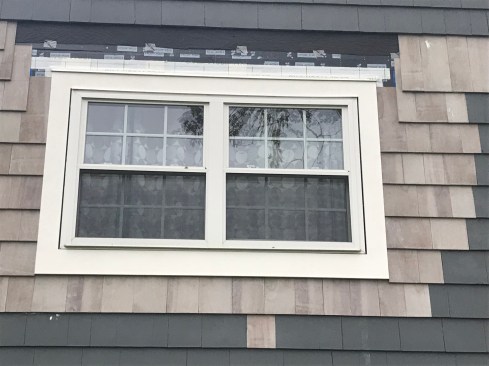
Caulking culprit. When I checked out the window from my ladder, the first thing I noticed was that there was no metal drip-cap flashing over the head casing. I also saw that caulking had been used to seal the cedar shingle siding tight to the top of the casing, trapping moisture behind the siding. Below the window, the casing was also caulked to the window, preventing water from draining out.
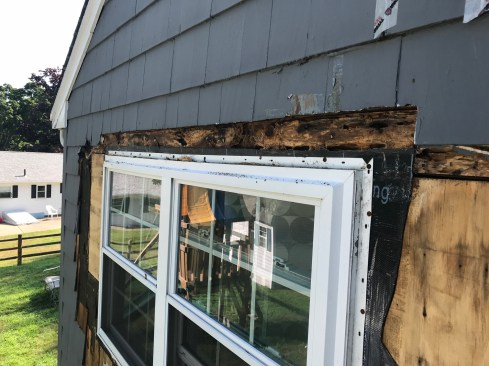

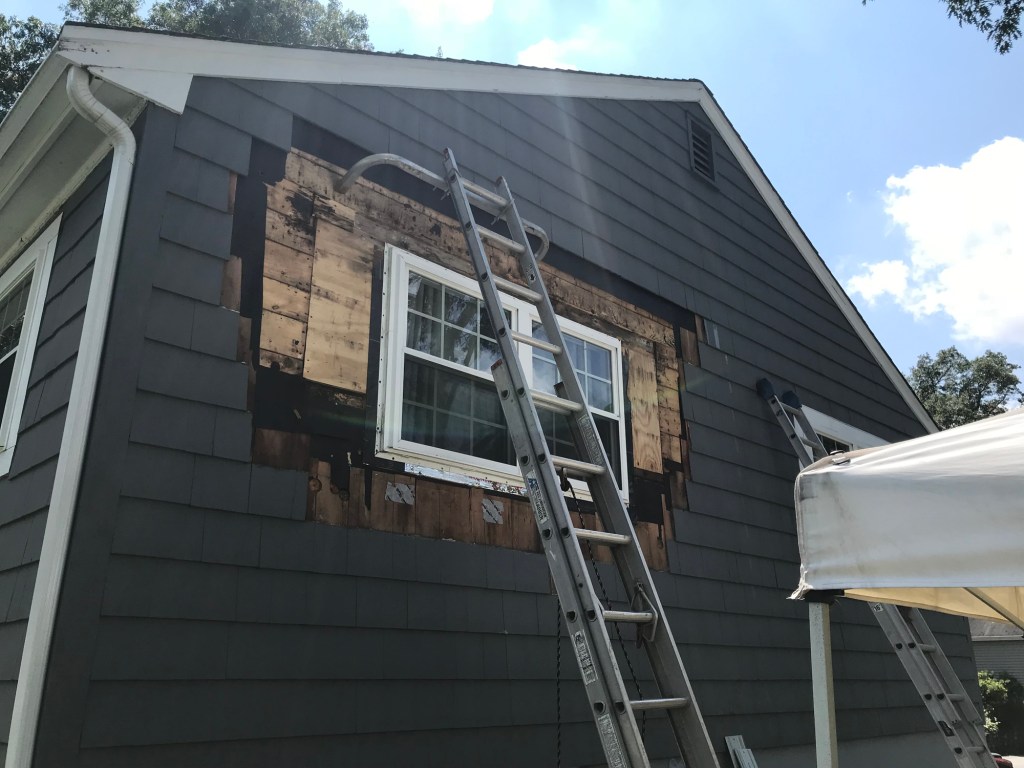
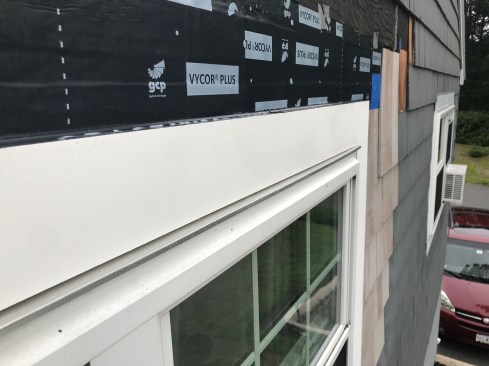
Areas of rot could be seen from the ground on both the window tr…
Siding issues. Another problem was that the new shingles had not been properly woven into the existing siding after the window was installed. In many places, the joints of successive courses did not have the proper offset of at least 1 1/2 inches. I also found that the top course of new shingles had just been butted and caulked against the course above, instead of being slipped up and behind the existing shingles. These defects allowed water to get behind the siding, leading to rotted trim and sheathing.
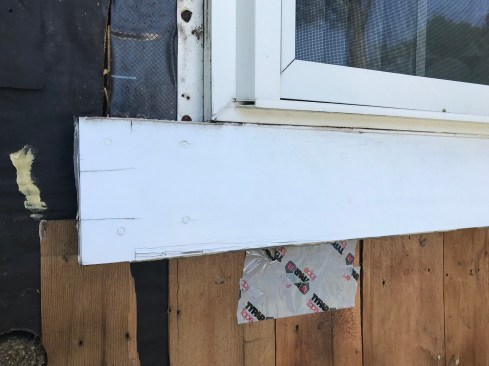
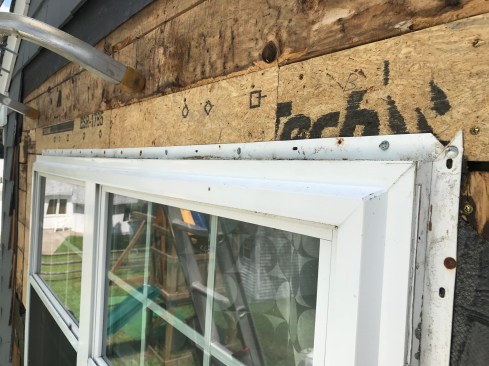
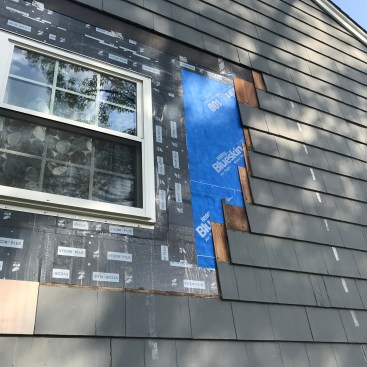
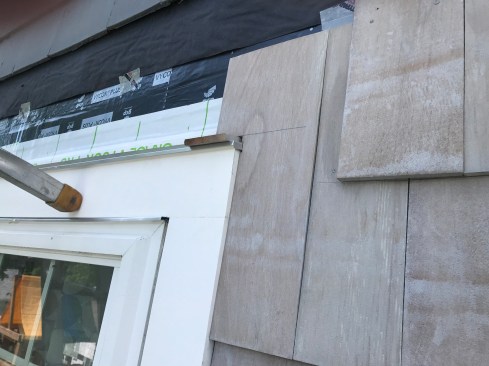
When I peeled back the shingles to expose the sheathing, I found that this window had replaced an existing window that was both shorter and wider. After reframing and sheathing the new rough opening, the carpenter had applied flashing tape along the sides before installing the window but hadn’t applied new housewrap over the sheathing, leaving a path for air and moisture to enter the structure.
Casing causes. When I pulled off the window casings, I could see that there was no flashing behind the bottom flange of the window. On the sides, the window flanges hadn’t been sealed to the sheathing with flashing tape, and the nails through the flanges were pretty rusty from water getting behind the casing. After pulling the nails and checking behind the flashing to make sure the sheathing hadn’t rotted, I renailed the side flanges with 2-inch galvanized roofing nails.
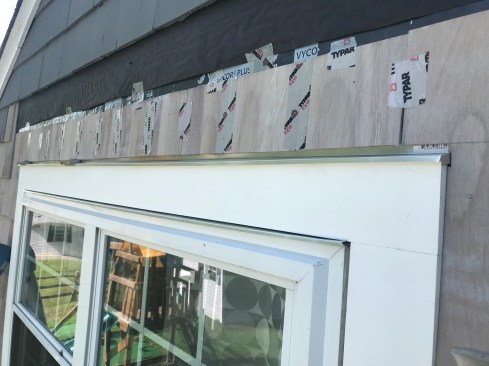
While there was flashing tape behind the top casing, it had been installed incorrectly, which contributed further to the rot in the sheathing above the window. Here, I removed enough shingles to expose the original housewrap and removed the rotten 1-by sheathing boards. With the sheathing removed, I found only minor damage to the framing, which didn’t require replacing. After replacing the sheathing, I opted not to remove the window from the opening, to keep the interior finish intact.
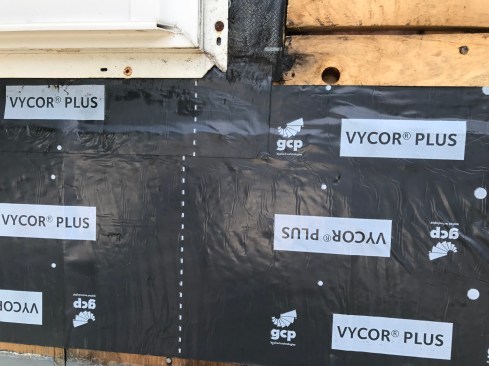
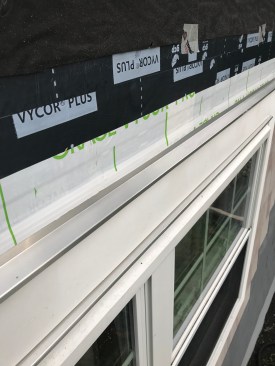
The author began by running wide self-adhering flashing tape up …
Fix the flashing first. After removing the nails from the bottom window flange, I installed SAF tape behind it, following the principles outlined in my article “Practical Window Flashing” (Apr/18). I layered the SAF from the bottom up, lapping it over the existing siding below the window and up and under the bottom window flange, and overlapping the existing side flashing tape.
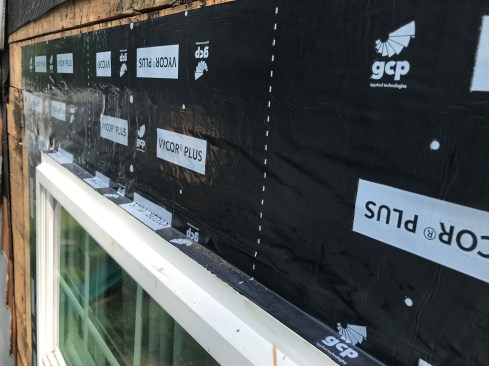
Next, I applied 12-inch-wide flashing on the sides from bottom to top to seal the window flanges to the sheathing, and pieced in new self-adhering housewrap on both sides. Then I sealed the top flange to the sheathing with 12-inch flashing tape, layering it shingle-style with the new and existing housewrap.
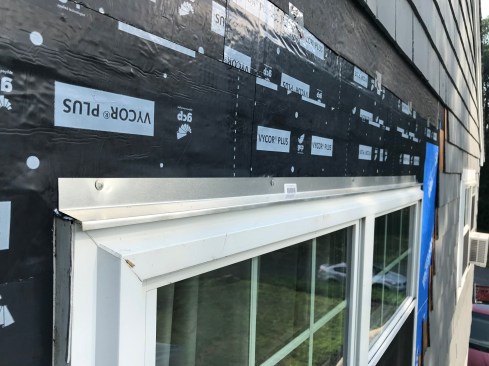
Trim and siding. Before casing the window, I installed a metal drip cap over the top of the window, sealing the cap’s top leg to the house with flashing tape. I trimmed the window with 1-by PVC stock that I assembled on my workbench, sizing it to leave a 1/4-inch gap between the casing and the window frame on every side. Then I installed another drip cap, over the head casing, again sealing the top leg with flashing tape.
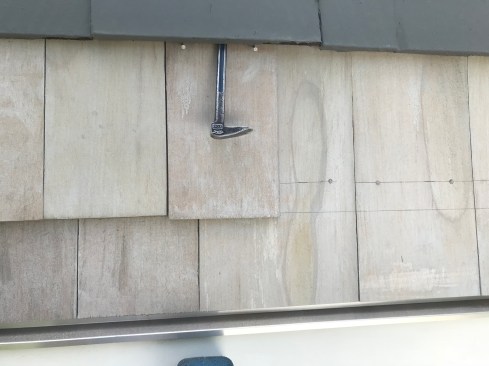
As I reshingled around the window, I made sure to properly offset the joints. Over the head casing, I used 3/8-inch gauge blocks to maintain a proper gap between the shingles and drip cap. To speed installation of the starter course over the window, I joined the cut shingles together on my worktable with pieces of tape and installed them on the wall as a single panel.
Before installing the final course of shingles, I cut just enough off the top of each shingle to keep it from hitting the nails above. Holding each shingle just below a layout line I had marked on the wall, I drove nails up at an angle just below the bottom edge of the shingles in the course above. Then I tapped each shingle up into position, hiding the nail heads. Finally, I applied sealant to the gaps between the sides of the window and the trim, leaving the gaps at the top and bottom open for proper drainage.
Photos by Emanual Silva